One-on-one defence should be the backbone of any defensive netball strategy, and with good reason.
It gives every player a straightforward task (shut down your opponent!) and a tight one-on-one defence will force opposition teams into disadvantageous positions – near the sideline or deep in their defensive third – which helps to force errors or risky passes that your players will be able to intercept.
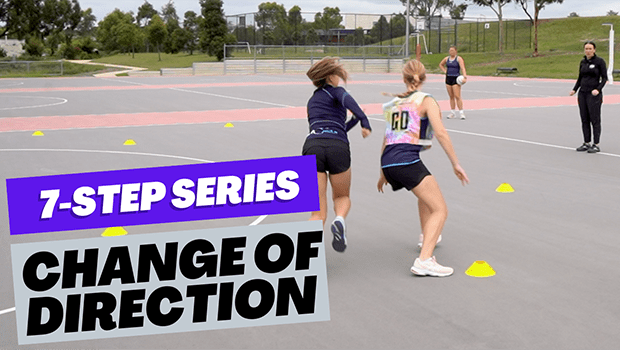
STARTING OUT: A GUIDE TO PLANNING YOUR TEAM’S FIRST SESSION
So where to start? Here’s an easy, one-hour session plan with a number of drills to begin to develop the basics of one-on-one defence with the players in your team.
WARM-UP: 15 MINS
Don’t skip the warm-up!
Spend at least 15 minutes taking your players through a combination of jogging, dynamic stretching (lunges, glute stretches, sumo squats, leg kicks/swings, Supermans), and then introduce a series of knee activation exercises.
SUBSCRIBERS CAN VIEW OUR KNEE/ANKLE ACTIVATION EXERCISES HERE
Then include some dynamic movements – bum flicks, high knees, changes of direction, sprints etc – and also include some defence-specific movements like backwards running and a defensive slide.
DEFENSIVE SHADOWING – 5-10 MINS
This drill gets players practising reacting to their opponent’s movements as quickly as possible.
SUBSCRIBERS: SEE THE ‘DEFENSIVE SHADOWING’ DRILL HERE
Aim to maintain three-feet distance the entire time, and get those feet moving. Players should be up on their toes, with their feet base about shoulder width apart.
Each player should work for 30secs-1min before switching roles. Ask players to work as the defensive player twice each, and switch the pairs around so everyone gets a look at a different opponent.
DEFENSIVE BLOCKING – 10 MINS
This is the platform on which you’ll build the majority of your defensive work. This drill introduces players to body angles, and how they can use those angles to channel their opponent into restricted spaces.
SUBSCRIBERS: WATCH ‘DEFENSIVE BLOCKING’ HERE
It also teaches players how to start using their body to physically block their opponent, and keep them in certain spaces once they’ve forced them there.
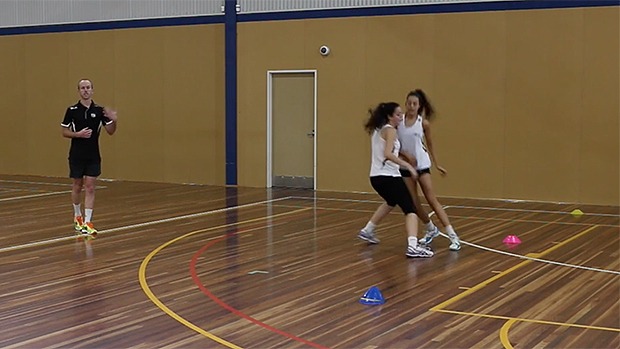
Players will find this style of defence a little easier than the ‘front stance’ you’ll move onto next, as it allows them to face their opponent
Each player should work a few times up and down the court as both the defender and the attacker. Again, rotate players around so they’re not working with the same partner the entire time.
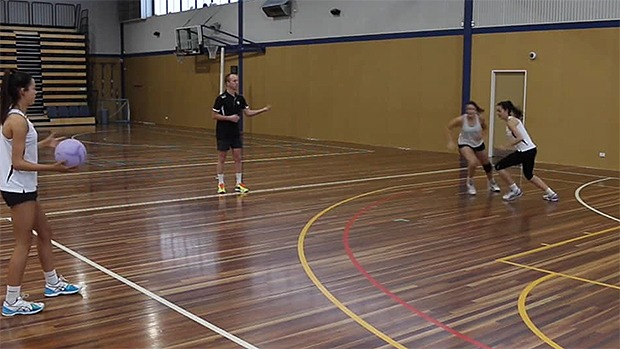
DEFENSIVE BLOCKING: FRONT STANCE – 10 MINS
Once players have mastered blocking their defender while facing them, it’s time to practice defending from in front.
Think about a WD trying to shut down a WA as the WA drives up the court, or a GK/GD defending a GS/GA as they drive out of the circle – that’s where this technique comes into play.
This one’s all about the player positioning their body to allow them to maintain vision of both their opponent and the action up court, while hopefully channeling their opponent towards the sideline.
SUBSCRIBERS: SEE THE DRILL IN ACTION HERE
Work each player through in their pairs multiple times as both the attacker and the defender.
WORKING THE DRIVER – 10 MINS
Now it’s time to get a little more competitive!
Split your players into groups of three, and use the ‘WORKING THE DRIVER’ drill, which is very effective in getting them practising stepping up onto the body and dictating while facing their opponent, and also covering their opponent and attempting to intercept while defending from in front.
It’s a great drill for GK/GD to work on defending their opponent hard all the way to the circle (rather than just turning and running back to the circle with them – we’ve all seen that!) and WD/C keeping their opponent off the circle for as long as possible.
Allow each player to work through 5-6 repetitions before switching over, until all three players have worked through, and then give each player another set of 5-6.
For more advanced players, get them to count how many tips/intercepts/held balls they get, and see if they improve on it the second time.
FINAL DRILL – 10 MINS
Choose any one of these more advanced drills to finish the session, depending on how your players have handled the basics. Again, look for them to get the basics right and encourage them to use the skills they’ve just learned.
THE LAST WORD
It’s important to revisit these drills and skills in the weeks after the initial session – they’re skills that need to be honed through practice and repetition, and they do take time.
At the next game, don’t forget to reinforce what the players have learned – both before, during and afterwards – and provide regular feedback and reminders about some of the key points.
Got a question? Feel free to contact us any time!